Today we discuss how to Install TWRP Recovery On Samsung Galaxy Note 5. Galaxy Note 5 is another top phone from Samsung’s most popular Galaxy Note series. Recently, TWRP recovery got updated with material designed to TWRP 3.0.0. That means you can install the latest TWRP 3.0.0 on Samsung Galaxy Note 5. In this guide, we will help you to Install TWRP Recovery On Samsung Galaxy Note 5.

If you are a Galaxy Note 5 user, then you can Install TWRP Recovery On Samsung Galaxy Note 5. And if you already install custom recovery on Note 5 then you can flash the latest version of the TWRP recovery to get more benefits. So here is the step by step guide to Install TWRP Recovery On Samsung Galaxy Note 5. Read the below note carefully before you Install TWRP 3.0.0 Recovery On Samsung Galaxy Note 5.
Note:-
- Installing Custom Recovery on Galaxy Note 5 will void your phone warranty, and you won’t claim it back.
- This method is only for the International Samsung Galaxy Note 5 (Sprint), Samsung Galaxy Note 5 DUOS, Samsung Galaxy Note 5 GSM only don’t try it on any other model.
- Follow the steps correctly otherwise you may brick your device. We are not responsible for any damage of your phone.
- It will erase all your personal data including data of internal storage, so we advise you first to take a complete backup of your phone and then proceed.
- Ensure that your phone has at least 50-60% charged to prevent the accidental shutdown in-between the process.
Files required to Install Custom Recovery On Samsung Galaxy Note 5 –
- Download Latest Odin Tool on your PC.
- Download and install Samsung Galaxy USB Drivers.
- Download Official TWRP Recovery for Samsung Galaxy Note 5 (Sprint) (nobleltespr).
- Download Official TWRP Recovery for Samsung Galaxy Note 5 GSM (noblelte).
- Download Official TWRP Recovery for Samsung Galaxy Note 5 DUOS (nobleltezt).
Steps to Install TWRP Recovery On Samsung Galaxy Note 5 –
1) First enable ‘USB debugging’ and ‘OEM Unlock’ option from setting>developer option>. To enable Developer Options, go to About phone and tap the Build Number 7 times.

2) Now download the Latest TWRP Recovery for your device.
3) Now Download the Odin tool from above and extract the zip file.
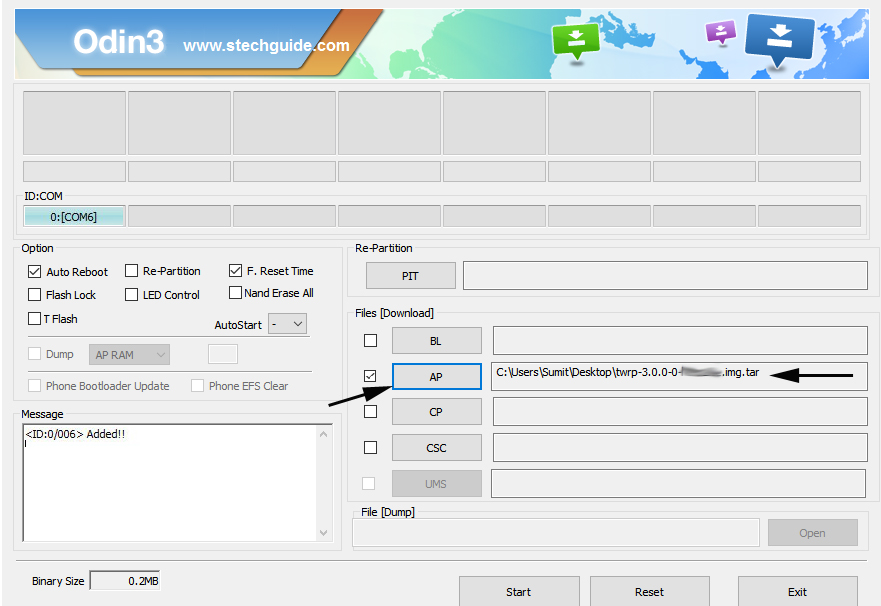
4) Run the Odin_v3.10.7.exe file on your PC.
5) Connect your Galaxy Note 5 to your PC with the data cable and reboot into the Download/Odin mode.
6) To enter into download mode turn off your phone and press and hold the ‘Home + Volume Down + Power’ buttons together until you see the download mode screen.


So this is the complete guide to Install TWRP Recovery On Samsung Galaxy Note 5 in easy steps. If you have any questions, then comment below.
4 Comments
FUCKING THANK YOU. I LOVE YOU. THIS SAVED ME. I SPENT 4 HOURS TROUBLESHOOTING THIS FUCK UNTIL I REALIZED I HAD THE WRONG TWRP. I WILL BLOW YOU IF I EVER MEET YOU IRL
I followed step by step correctly and see ” Pass‘ in Green Color on Odin screen.
But stuck on logo during reboot.
Try clearing Cache and Dalvik after flashing the recovery.
followed those instructions and cannot install twrp, always failed are you sure that you need to be in a download mode not an recovery mode ?