Here is a quick guide to How To Root Coolpad Note 3 and Install Custom Recovery on it. Coolpad Note 3 is one of the most affordable 3 GB RAM phone in India. Coolpad Note 3 sports a 5.5-inch 720p HD display and powered by a 1.3GHz 64-bit MediaTek MT6753 octa-core processor with 3GB of ram and 16GB internal memory. Coolpad Note 3 has a 13MP rear camera and 5MP front camera and 3000mAh battery. One of the best things is that it comes with a fingerprint scanner which you found it on high-end devices. This is the cheapest phone with 3GB ram and fingerprint scanner. So if you are looking to Root Coolpad Note 3 and Install Custom recovery on coolpad note 3 then download the below files first.
Various custom recovery for Coolpad Note 3 are available but today we discuss how to install TWRP Recovery on Coolpad Note 3. Read the below note carefully before you Root Coolpad Note 3 and Install Custom recovery on Coolpad Note 3.
Note:-
- Installing Custom Recovery on Coolpad Note 3 will void your phone warranty, and you won’t claim it back.
- Follow the steps correctly otherwise you may brick your device. We are not responsible for any damage of your phone.
- It will erase all your personal data including data of internal storage, so we advise you first to take a complete backup of your phone and then proceed.
- Ensure that your phone has at least 50-60% charged to prevent the accidental shutdown in-between the process.
Files required to Root Coolpad Note 3 and TWRP Custom Recovery –
- Download SP_Driver_V2.0 and driver_setup_150313
- Download SP Flashtool
- Download TWRP Recovery for Coolpad Note 3
- MT6753_Android_scatter.txt
- SuperSU_v2.49.zip
Steps to Root Coolpad Note 3 and Install Custom Recovery –
1) First, enable USB debugging from setting>developer option>. To enable Developer Options, go to About phone and tap the Build Number 7 times.

2) Download SP_Driver_V2.0 and driver_setup_150313 from above and extract them on your PC.
3) Now install the drivers and reboot your PC.
4) Now download SP Flashtool from above and extract it on your Desktop.
5) Now Download TWRP Recovery for Coolpad Note 3 from above and rename it to recovery.img. Paste recovery.img & MT6753_Android_scatter.txt in SP Flash Tool folder.
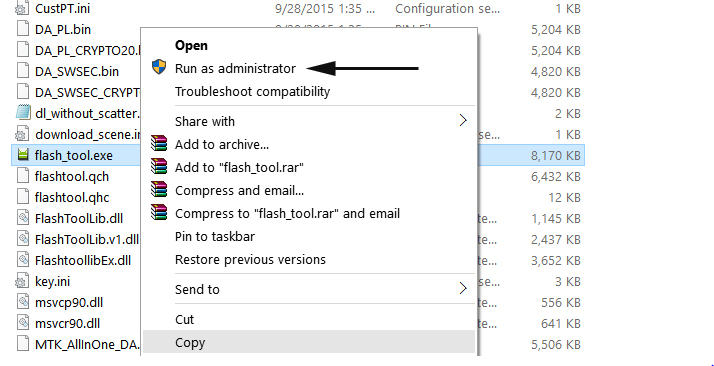
6) Now right click on “flash_tool.exe” and run it as administrator.
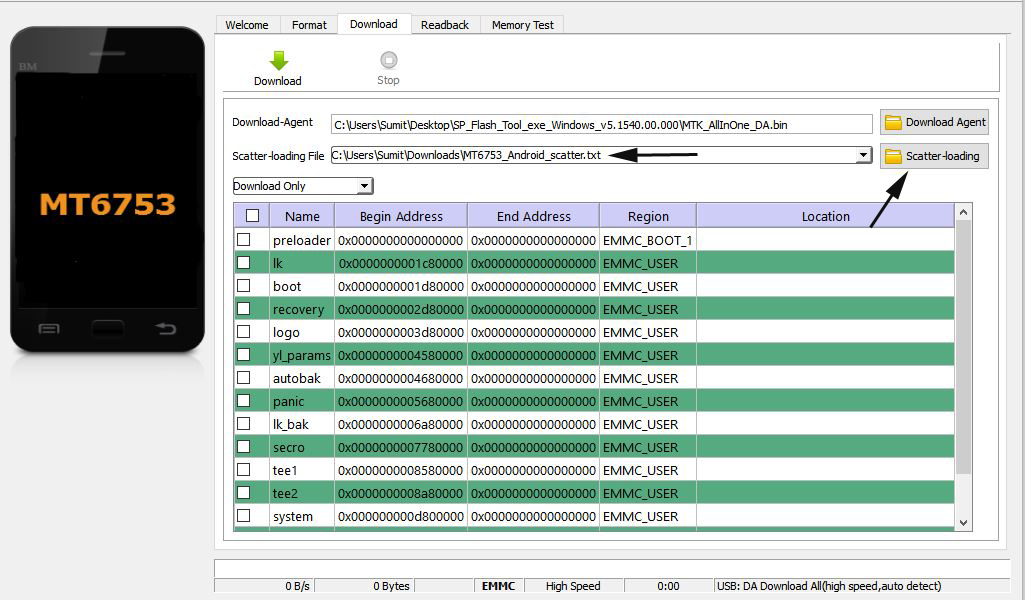
7) Now in SP tool window click on the scatter-Loading option select “MT6735M_Android_scatter.txt” file.
Now open the SP Flashtool folder and paste the recovery.img & MT6753_Android_scatter.txt
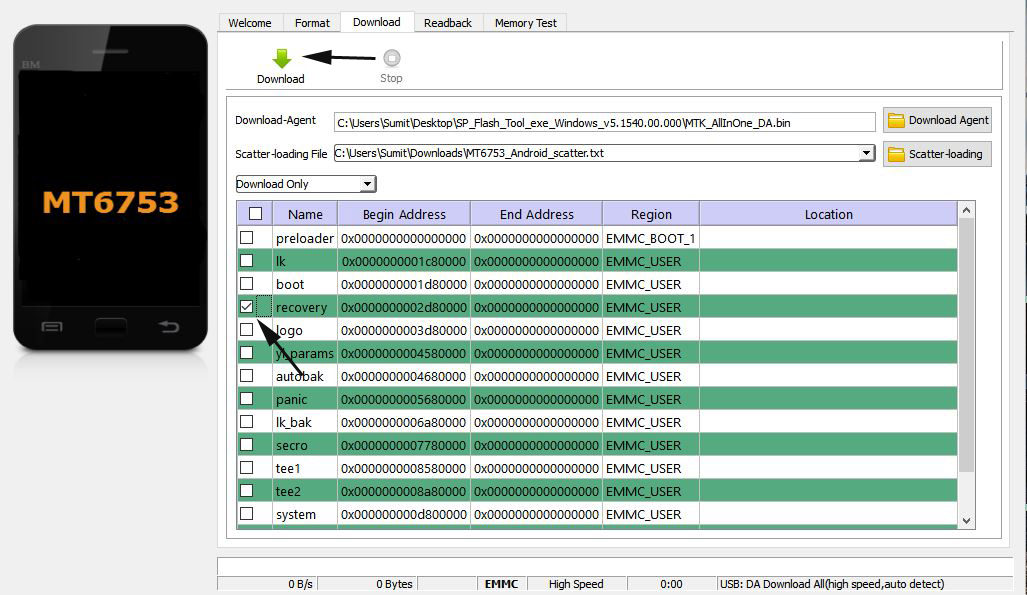
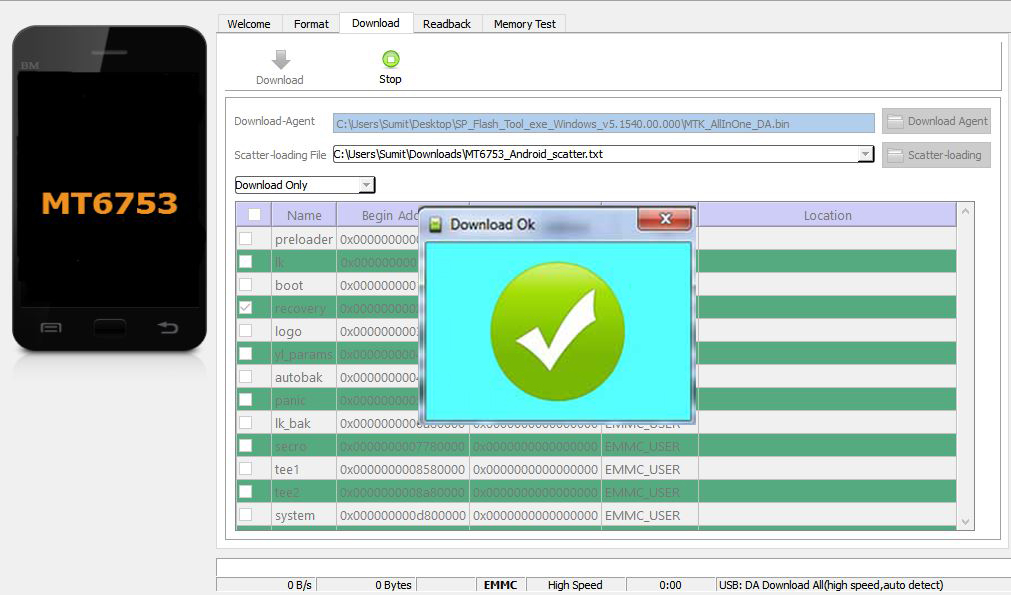
8) Now check the Recovery option and Click on Download button from the left top.
9) Now switch off your phone and connect it to PC via USB cable and press the Volume Up button two times. This will flash the TWRP recovery on your device.
10) Now you have seen a successful message on SP Flash Tool Window. Now disconnect your device from PC and boot into recovery mode by pressing “Volume up and Power button” together.
11) In TWRP recovery navigate to Install Zip and select ‘SuperSu.zip’ to root Coolpad Note 3.
12) Swipe to install SuperSu and then reboot your device. That’s it.
Now you Root Coolpad Note 3 and Install TWRP Recovery on it successfully. If you have any questions comment below.
8 Comments
Can you please tell me how to root coolpad note 3 marshmallow version
Will this work with note 3 plus
I’m using coolpad note 3.. How to update marshmallow
bro i have evry thing u said but in the end when i hold the power button and vol up key it shows no coommand
p.s. i even saw the okay tick but still dont know its happening
and i have done it 2-3 times
coolpad note 3 plus
i faced same thing, but you press same key again it will work [press long when no command showing you]
Did u try it? And it worked….
Bro my note 3 device fingerprint is been stopped working there was no problem in hardware ….the query is can I get the fingerprint back to working condition by rooting up the device..??
i copied supersu directory in the sdcard, but in the root option it will not displayed that directory, even some files and directory also hidden.