Nexus 6P is the latest Google’s new flagship device which is manufactured by Huawei. It is one of the best smartphone of the year and the coolest Nexus device. Nexus 6P offers a pure Android experience with powerful hardware and latest OS. Nexus 6P comes with a Qualcomm Snapdragon 810 octa-core processor with 3GB of RAM. It comes with a 5.7 inches 1440p Samsung AMOLED display with 518ppi pixel density. Also, it has 12.3 MP with 1.55 µm pixels Rear and 8MP with 1.4 µm pixels front camera. Unlike other Nexus devices, this phone comes with a fingerprint scanner and USB c-type cable. Although Nexus 6P comes with powerful specifications, you can still unlock bootloader of Nexus 6P to get more.
Nexus 6P comes with a locked bootloader. If you really want to play with the smartphone, you need to unlock its bootloader. If you’re planning to install a custom ROM or want to root your phone, you have to unlock the bootloader of Nexus 6P first. Once you unlock your phone bootloader, you can root and install a custom recovery on your phone. So here is the step by step guide with the help of that you can quickly unlock bootloader of Nexus 6P. Read the below note carefully before you unlock bootloader of Nexus 6P.
Note:-
- Rooting may void your phone warranty, and you won’t claim it back.
- Follow the steps correctly otherwise you may brick your device. We are not responsible for any damage of your phone.
- It will erase all your personal data including data of internal storage, so we advise you first to take a complete backup of your phone and then proceed.
- Ensure that your phone has at least 50-60% charged to prevent the accidental shutdown in-between the process.
How to unlock bootloader of Nexus 6P –
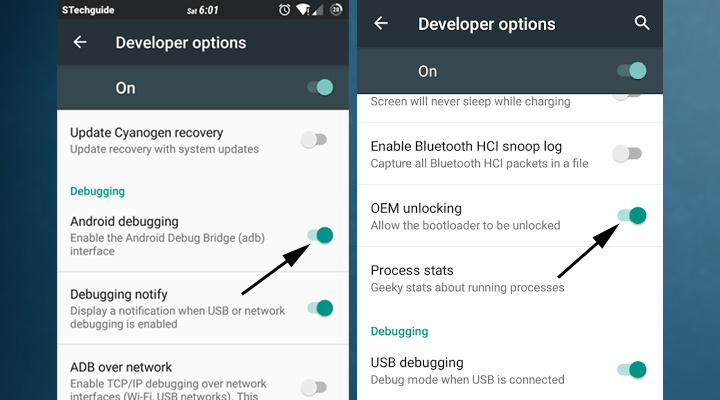
1) First enable ‘USB debugging’ and ‘OEM Unlock’ option from setting>developer option>. To enable Developer Options, go to About phone and tap the Build Number 7 times.
2) Install the ADB and fastboot driver for windows or ADB and Fastboot for Mac and then restart if you already have the driver installed then skip this step.
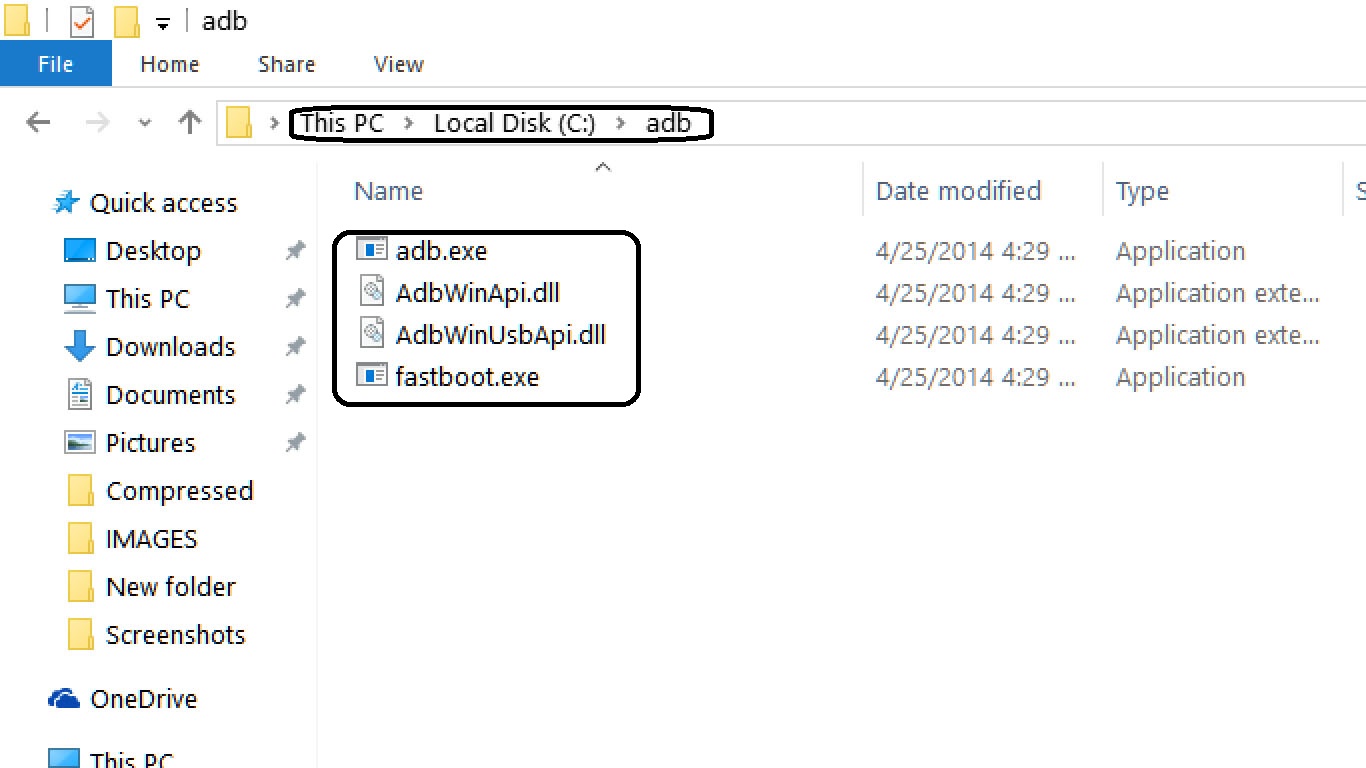
3) After installation of the driver, you can see a folder named ADB in your installation directory. Enter into the folder and you find four files including ADB and fastboot.exe.
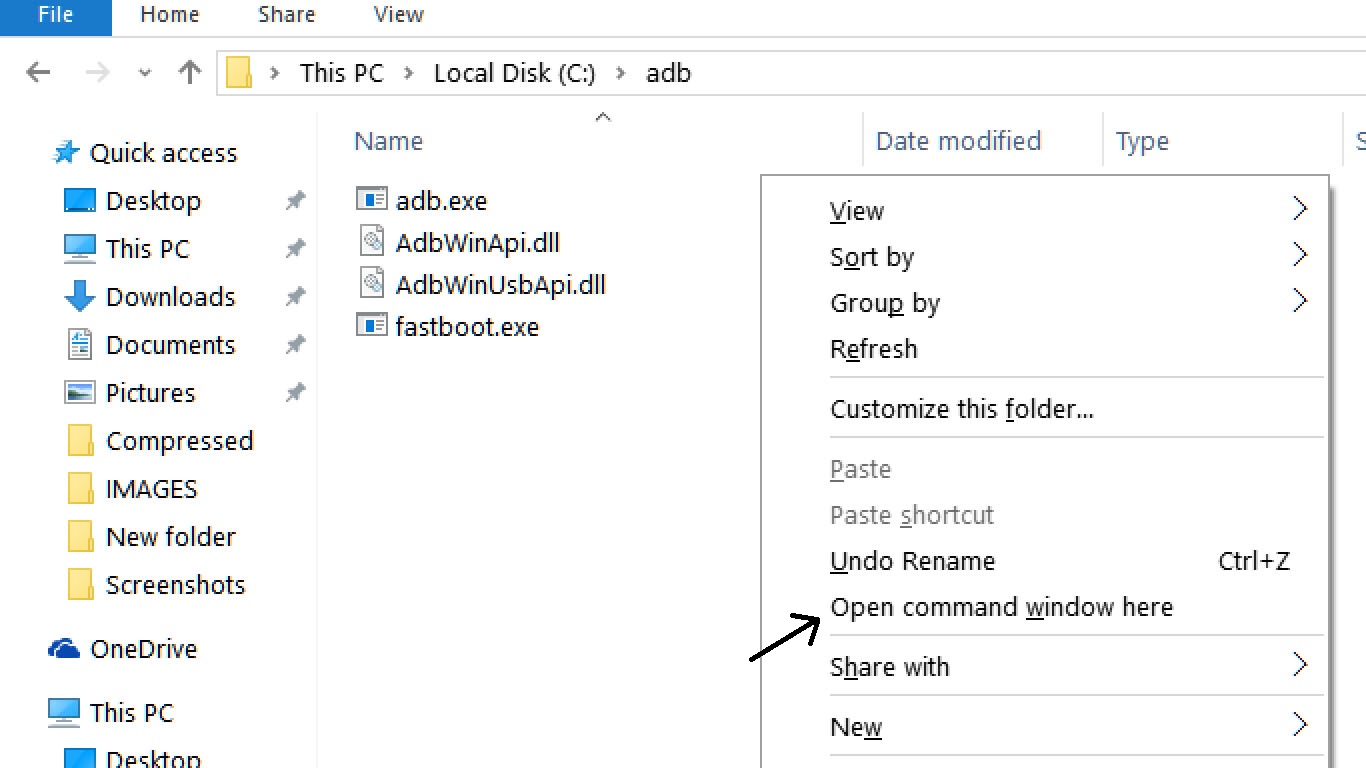
4) Now press and hold ‘shift’ key and right-clicked anywhere in the folder and select ‘Open command window here’.
5) Now connect your device to PC and enter into the fastboot mode by pressing a combination of ‘Power + Volume Down’.
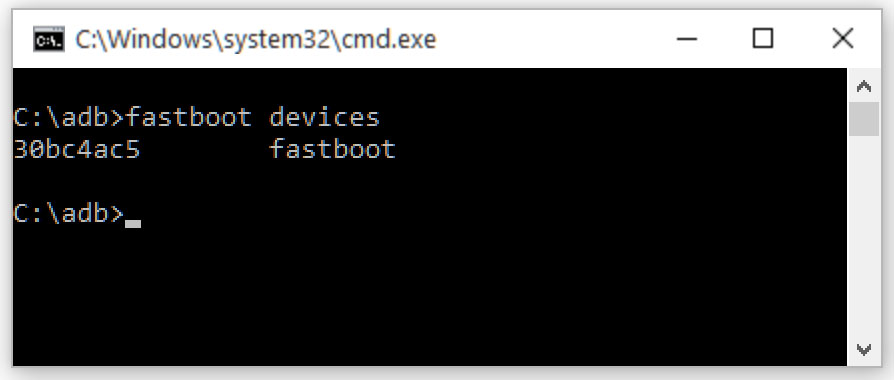
6) You are in Fastboot mode now to check your connection enter “fastboot devices“ in command prompt. It will return your device serial number means your device properly connected. Check your driver if the above command is not responding.
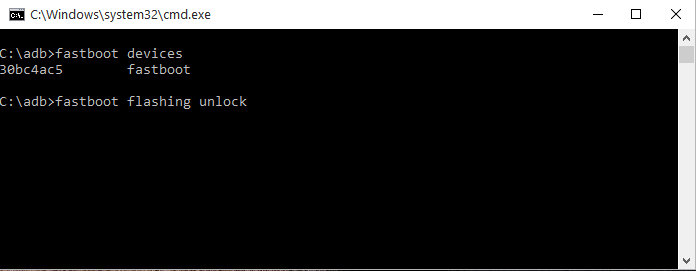
7) To unlock bootloader of Nexus 6P, go to the command line and type “fastboot flashing unlock” it will ask you to confirm the Action, you can confirm it by selecting ‘Yes’. It will only take seconds to complete the process. To relock the bootloader pass “fastboot flashing lock” command.
8) Above step will unlock bootloader of Nexus 6P. Now your device will reboot into bootloader mode, to restart the system issue “fastboot reboot” command.
This is the complete guide of how to unlock bootloader of Nexus 6P. But unlocking your bootloader alone is not enough you should install a custom recovery and root your device to get full access. If you have any doubt related to above process comment below and stay tuned for our guide of how to root and install a custom recovery on Nexus 6P.
4 Comments
How to upgrade note4 to marshmallow
Official marshmallow still not available for galaxy note 4 but you can install CM13 (marshmallow 6.0 based) ROM for your Note 4. We will post detail guide here soon.
What is the process for Mac users?
Process for Mac user is almost same. You have to setup ADB and Fastboot for Mac first (Check Here). Also in Mac use ‘./’ before passing any command in Terminal. For Example use “./fastboot flashing unlock” instead of “fastboot flashing unlock“