Asus starts rolling out the Marshmallow update for Zenfone Selfie (ZD551KL). Asus ZenFone 2 Laser and Zenfone Max already received the Android Marshmallow update. The update is an Official build which rolled out in phase wise manner. The update is rolling out via OTA (Over the Air) but for those who don’t want to wait for the OTA can manually Update ASUS ZenFone Selfie to Marshmallow. The ASUS ZenFone Selfie runs on Android Lollipop but now you can Update ASUS ZenFone Selfie to Marshmallow. The new Marshmallow update packed with features like Now on Tap, Doze Mode, App Permissions and more. The Android 6.0 Marshmallow update for ASUS ZenFone Selfie ZD551KL is available via OTA (over-the-air) and it is about 1.63GB in size. Here we provide you the OTA zip file with that you can Update ASUS ZenFone Selfie to Marshmallow manually via ADB or recovery. Download ASUS ZenFone Selfie Marshmallow OTA file from below.
Latest Android 6.0 Marshmallow update for ASUS ZenFone Selfie (ZD551KL) is rolling out. Asus ZenFone Selfie Marshmallow Update not only bumps the version to Android 6.0 but also it removed a dozen of unwanted bloatware and comes with many improvements and bug fixes. To Update ASUS ZenFone Selfie to Marshmallow manually, first download the OTA file for Zenfone Selfie from below.

Features and Changelogs –
Improvements –
- Update OS to Android M
- APP2SD won’t be supported in Android 6.0 (Marshmallow). Please move apps to the internal storage before system upgrade.
Removed Apps –
- ASUS Backup
- Mirror
- Remote Link, Party Link, PC Link
- Photo Frame
- What’s Next
- ASUS MyFrame, ASUS MyWater
- Omlet
- Data Transfer
- Snap View
- Dr. Eye
Add new features and new apps –
- Google Calendar
- Google Messenger
- Motion Gesture
- Camera: Pano Sphere Mode
Note: –
- Make sure you at least 2GB of free space on your device.
- This process is only for ZenFone Selfie (ZD551KL) so don’t try this on any other variant.
- The update won’t work if you disabled any system app or move APP2SD. Please move apps to internal storage before system upgrades.
- I am not responsible for any damaged hardware or software arising from this process, so proceed at your own risk.
- Battery level should be 75% before you Update ZenFone Selfie to Marshmallow.
- It is recommended to take backup of your device and do a factory reset after installing the update if you are facing forced closed error.
Download Marshmallow OTA File for ASUS ZenFone Selfie –
- Asus Zenfone Selfie Marshmallow Update – Download , Download Page
- ASUS ZenFone 2 ZE551ML Marshmallow FOTA file – Download
- ASUS ZenFone Max Marshmallow update – Download
- ASUS ZenFone 2 Laser Marshmallow update – Download
How to Update ASUS ZenFone Selfie to Marshmallow Manually –
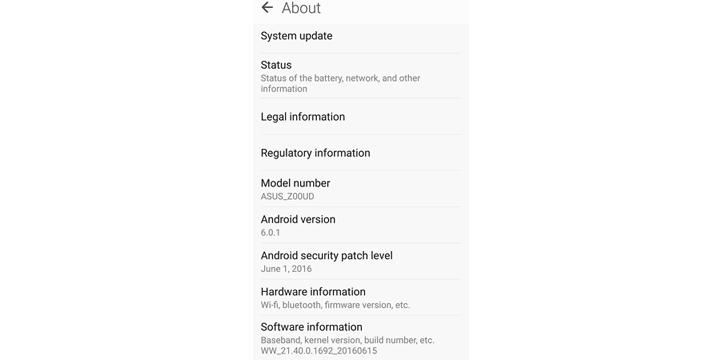
1) To manually check the update, you can head over to Settings > About phone > System updates > Check For Update.
2) Enable ‘USB debugging’ option from setting>developer option>. To enable Developer Options, go to About phone and tap the Build Number 7 times.
3) Download ADB and fastboot driver for windows or ADB and Fastboot for Mac and install it on your PC.
4) Download the Android Marshmallow Zip file for Asus Zenfone Selfie (ZD551KL) from above Copy ROM to a folder.
6) Now Turn Off your phone and boot into recovery mode by pressing Power+Volume down
7) Choose Apply Update from ADB
8) Now Connect your phone to Laptop/PC
9) On Marshmallow beta ROM folder press shift+right click and click on open command here.
10) Now check your connection by typing the below command
adb devices
if your device is listed you’re ready to flash the ROM
11) Flash the Marshmallow Beta ROM on Asus Zenfone Selfie by typing below command
adb sideload File_Name.zip
12) Now wait until the process complete and then Reboot the phone (first boot will be longer than 5 minutes)
13) Done! you Update ASUS ZenFone Selfie to Marshmallow successfully.
This is the easiest way to Update ASUS ZenFone Selfie to Marshmallow manually. If you have any questions, comment below.
Source – Asus
25 Comments
I can’t find Marshmallow ROM Folder.. Where is that?
Placed the zip file you downloaded in adb folder and open command window there
How does fill in file name ? Is it UL bla bla bla ?
Yes exactly
adb doesn’t show my device [my device is not listed ]…
what should i do ?
Check your device driver or try with diffrent usb cable
* cannot read ‘File_Name.zip’ *
did you replace File_name with file of your zip file?
adb cannot read my file name. I input it correctly, but nothing changes. What should I do?
did you place zip file in right folder?
where is the right folder?
Place the file in ADB folder
i typed in the exact file name but it still says “cannot read”. where do i place the zip file
i placed them in the same folder as abd.exe but cant work
so the firmware file is on zip and no need to ekstract, just copy it to adb folder
for exp, firmawrename.zip, so copy it to adb folder, and do step 6 untill 10, at step 11 , type on cmd, or powershell may on win 10, (adb sideload firmware.zip) without () then press enter
”Adb” , isn’t recognized as an internal or external command . Why ??
This method doesn’t works. If you want to upgrade, see this:
http://techtonicstuff.blogspot.in/2016/08/upgrade-zenfone-selfie-to-marshmallow.html
Everytime when it shows software update I download it nd install but in between installing it shows error that system partition has unexpected contents what should I do?
Hey I downloaded the file manually.But by mistake the installation got cancelled.What to do next????
Try again.
” can’t read ‘rom.zip’ “
we will update means any problem to phone
hello, i have one problema, ” E:Error in sideload/package.zip
(status 7)
E: fota_return_code 409″
help me pls!!!
this method doesnt works
hey sir, nice info here, i’ve looking for this way b’coz my phone dont want to update automatically, i dont no why, its lollipop and if i press to check update, no change had made, this step is verry usefull thanks alot, i apreciate it, sorry for my bad english,