Now you can Update Xperia XZ to Android 8.0 Oreo by installing an unofficial AOSP 8.0 ROM. Recently Google released the official Android 8.0 Oreo Update for Pixel and Nexus Devices and Android Oreo Source code. Now developers already start working on building a ROM based on Oreo and now first AOSP 8.0 Oreo ROM for Xperia XZ is available for download. If you want to taste Android Oreo on Xperia XZ then follow our guide to install Android 8.0 Oreo on Xperia XZ.
XDA Senior Member fastbooking released the initial build of Android Oreo ROM for Xperia XZ and the ROM is stable enough to use as daily driver. The ROM comes with many Android Oreo features and almost everything working with very fewer bugs. You need to be rooted, and TWRP installed on your device to use this ROM. Download and Install Android 8.0 Oreo on Xperia XZ from below.
The ROM is an initial Oreo build for Xperia XZ and missing many features, but the developer still manages to make this ROM usable. This build contains some minor bugs and it’s improved with time, but the good news is you can experience Android Oreo on Xperia XZ. The Xperia XZ Android Oreo ROM brings all Android Oreo features to your device. Download Android 8.0 Oreo on Xperia XZfrom below and Update Xperia XZ to Android Oreo manually.
Note:-
- This ROM is work on Xperia XZ. Don’t try this on any other device.
- The ROM is an initial Oreo build and contains bugs.
- Follow the steps correctly otherwise you may brick your device. We are not responsible for any damage to your phone.
- It will erase all your data, so we advise you first to take a complete backup of your phone and then proceed.
- Ensure that your phone has at least 50-60% charged to prevent the accidental shutdown in-between the process.
Download AOSP 8.0 Oreo ROM for Xperia XZ
- Download Android 8.0 AOSP ROM for Xperia XZ – Download, Mirror (Development Page)
- Android 8.0 Oreo Gapps For Xperia XZ – Download
- Magisk for Xperia XZ – Download
How to Install Android 8.0 Oreo on Xperia XZ
- First, download and install a custom recovery. If you already had a custom recovery installed on your device then skip this step.
- Enable ‘USB debugging’ and OEM Unlock’ option from setting>developer option>. To enable Developer Options, go to About phone and tap the Build Number 7 times.

- Install the ADB and fastboot driver for windows or ADB and Fastboot for Mac and then restart if you already have the driver installed then skip this step.
- After installation of the driver, you can see a folder named ADB in your installation directory. Enter the folder, and you find four files including ADB and fastboot.exe.

- Now Download the ROM from above and extract it in ADB and Fastboot folder and then press and hold ‘shift’ key and right-click anywhere in the folder and select ‘Open command window here’.

- Now connect your device to PC and enter into the fastboot mode. To enter the fastboot mode of Xperia XZ type the below command.
adb reboot bootloader
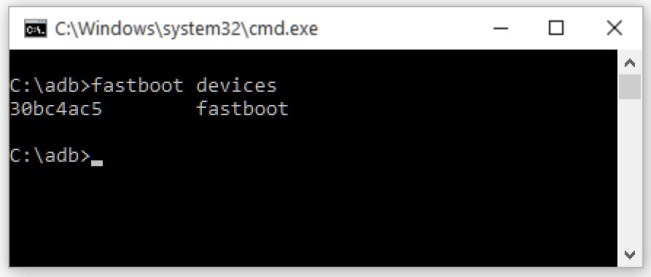
- You are in a Fastboot mode now to check your connection by entering below command in command prompt. It will return your device serial number means your device properly connected. Check your driver if the above command is not responding.
fastboot devices

- Now issue the below command one by one.
fastboot flash system system.img
fastboot flash boot boot.img
- Now reboot into Recovery.
- Flash the GApps zip file.
- Now Flash the SuperSu/Magisk zip (Optional).
- Now wipe cache & Dalvik cache again and Reboot your device.
- Done!
This is the complete guide to Download and Install Android 8.0 Oreo on Xperia XZ. Comment below if you have any doubts. Stay connected with us via Facebook, Twitter, and Google Plus to read more such helpful posts.

![Install Android 8.0 Oreo on Xperia XZ [AOSP 8.0 ROM]](https://www.stechguide.com/wp-content/uploads/2017/09/Install-Android-8.0-Oreo-on-Xperia-XZ-AOSP-8.0-ROM.jpg)